How to deploy a production app on a VPS and automate the process with Docker, GitHub Actions, and AWS ECR.
Learn to deploy your app on a VPS and automate with Docker, GitHub Actions, and AWS ECR! This guide explains how I do it with ease and reliability.


Table of contents
In this article, we will learn what it means to push an application in production and how to make it happen automatically, we will see docker and GitHub action for that. Since we are using docker I won't spend too much time on what technologies have been used to write the application rather than what to do with the docker image itself. The premise means here a simple server, let it be a simple VPS (Virtual Private Server), a dedicated server, or any server where you have SSH to use it. We have to perform actions, prepare the server to receive and execute the app, and set up the deployment pipeline. For the upcoming part of this article, I will consider you have a Ubuntu server
Let's prepare the server
The very first thing to perform some one-time config on the server, the goal is to prepare it for the next steps. For this purpose, we have to consider the following topics:
Docker Compose to run the application and its dependencies
Docker Compose is a tool that runs many Docker applications as services and lets them communicate with each other, as well as other features like volumes for file storage. Let's first install Docker and Docker Compose on the server; you can follow the official installation guide here: docs.docker.com/engine/install/ubuntu. After this, it's important to run it as a non-root user; here is what the official documentation says: docs.docker.com/engine/security/rootless.
Set up an AWS ECR & CLI credentials.
Do note that you can achieve the same goal with another registry if you want, I am just using AWS here because it's more simple for me.
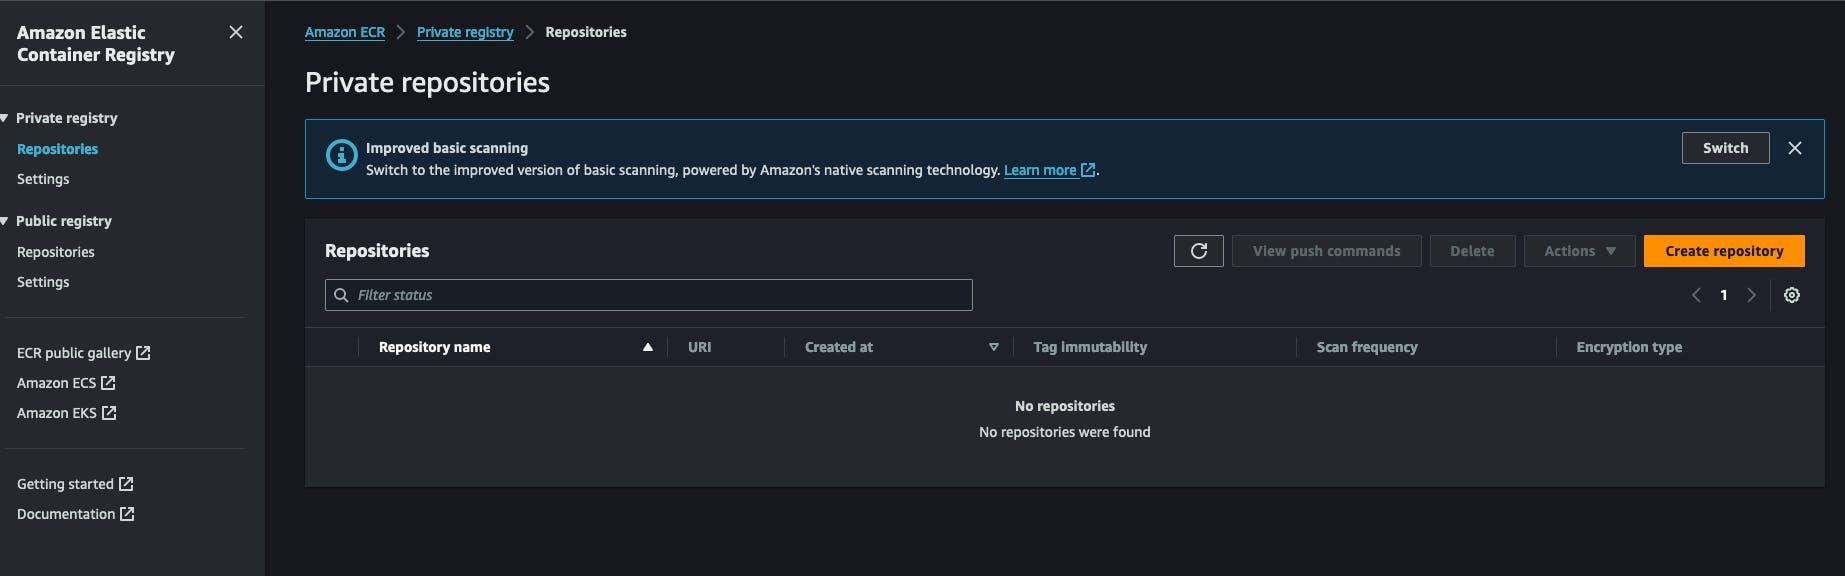
Since we are using Docker, the images will have to be stored and retrieved from somewhere. For this purpose, I am using AWS ECR (Amazon Web Services Elastic Container Registry). It's a Docker registry within an AWS account. It's very cheap to use and easy to set up. You can also use Docker Hub to create a private repository for your images. It all starts by creating an ECR private registry in the AWS account. You will click on "Create Repository" and fill in the name of the repository.
After creating a repository you can copy the repository URI and keep it for later. It has the following format AWS_ACCOUNT_ID.dkr.ecr.AWS_REGION.amazonaws.com/REPOSITORY_NAME .
You will also need to set up AWS IAM credentials that have the right to pull/push from/to this repository. Let's head to the IAM service, click on new user and attach the following policy to him: AmazonEC2ContainerRegistryFullAccess , you don't need to enable access to the AWS console for him. At the end of this process, you receive 2 keys from AWS, a secret key and a secret key id, keep them aside we will need them for the upcoming work.
Back on our server, we need to install AWS CLI. The official way of installing it is available here. https://docs.aws.amazon.com/cli/latest/userguide/getting-started-install.html#getting-started-install-instructions. After this you can test the installation by running aws --version the command. At this step, you will have to execute the command aws configure and respond to questions by providing the previous keys generated on aws, the secret key , and the secret key id . You will also be prompted to choose an output format, simple just JSON, and provide a default region, it's better to choose the region where you created the ECR registry earlier.
Set up the application runner script.
In my workflow I have written a little shell script that performs certain actions, it's the key part of this process, it login to the registry, downloads the image, and restarts the corresponding docker service, I just call it redeploy.sh and save it under a folder from where I want to run my app, here is the content:
#!/bin/bash

# Retrieve AWS ECR login command
aws ecr get-login-password --region [SWS_REGION] | docker login --username AWS --password-stdin [AWS_REGION].dkr.ecr.us-west-2.amazonaws.com

# Associating repositories with identifiers
declare -A repositories=(
    ["web"]="[REGISTRY_NAME]:latest"
)

# Check if service identifier is provided as a command line argument
if [ -z "$1" ]; then
    echo "Please provide a service identifier as a command line argument."
    exit 1
fi

service_identifier=$1

# Check if the provided service identifier exists in the repositories array
if [ -z "${repositories[$service_identifier]}" ]; then
    echo "Invalid service identifier. Available identifiers: ${!repositories[@]}"
    exit 1
fi

# pull the new image from the registry
repository=${repositories[$service_identifier]}
echo "Pulling [AWS_ACCOUNT_ID].dkr.ecr.[AWS_REGION].amazonaws.com/$repository"
docker pull "[AWS_ACCOUNT_ID].dkr.ecr.[AWS_REGION].amazonaws.com/$repository"

# Change directory to [APP_FOLDER]
cd /home/ubuntu/[APP_FOLDER] || {
    echo "Failed to change directory to /home/ubuntu/[APP_FOLDER]"
    exit 1
}

# stop and restart the service, this wil force docker compose to redownload the lates image
echo "Re-running service $service_identifier"
docker compose stop "$service_identifier"
docker compose up --no-deps "$service_identifier" -d

# Remove old and un-used docker images
echo "Removing unused Docker images"
docker image prune -fa
echo "Removed Dangling Images"
The first step of this script consists of logging into the AWS account with AWS CLI to get a token that docker will use when retrieving the docker image, remember the registry is private, we can't just pull it without being authenticated.
Then we declare a repository list and associate them with some identifier, the specified identifier will be used as a command line arg, more on this later. After this we verify if the user has provided an argument that corresponds to an existing service identifier, we want him to type something like ./redeploy web for example, the script will associate the argument web to the repository web as in the second step.
After having the service identifier we create the repository URL dynamically and perform a docker pull with it. This ensures the docker image is getting downloaded to our system.
The script will now cd into the application folder, /home/ubuntu/[APP_FOLDER] this assumes you are running everything under the user ubuntu and the his HOME folder is named ubuntu , APP_FOLDER contain the whole setup.
The next step consists of stopping and starting the service after which we simply remove old and unused images with the command docker image prune -fa you can learn more here: https://docs.docker.com/reference/cli/docker/system/prune/.
The Docker compose file
Compose is the utility that runs our whole system, it needs a file named docker-compose.yml where you will define everything, let's assume our app needs a redis and a postgres service to run, here is what it will look like:
version: '3.9'
services:
  web:
    image: "[AWS_ACCOUNT_ID].dkr.ecr.[AWS_REGION].amazonaws.com/myapp:latest"
    ports:
        - 8080:8080
    depends_on:
        - redis
        - db
    env_file:
        - .env

  redis:
    image: 'redis:alpine'
    ports:
      - '6379:6379'
  db:
    image: 'postgres:14'
    restart: always
    environment:
      POSTGRES_PASSWORD: postgres
      POSTGRES_USER: postgres
      PGDATA: /var/lib/postgresql/data/pgdata
    healthcheck:
      test: [ "CMD", "pg_isready", "-q", "-d", "postgres", "-U", "postgres" ]
      timeout: 45s
      interval: 10s
      retries: 10
    ports:
      - '5437:5432'
    volumes:
      - ./opt/postgres/data:/var/lib/postgresql/data
You volume ./opt/postgres/data:/var/lib/postgresql/data will map the content of the Postgres server to the local disk so it can't get lost when the docker container stops running. Learn more about running Postgres with docker-compose here https://medium.com/@agusmahari/docker-how-to-install-postgresql-using-docker-compose-d646c793f216. I've used a directive name env_file this allows docker-compose to read a file a load its content into the docker container at runtime, i did this because usually, the docker-compose file is committed to a VCS there I don't want to keep the environment variable into it directly via the environment directive in the service. Note that our service is named web here, earlier we wrote a file redeploy.sh and we intend to run it like this:
./redeploy.sh web
The web argument is linked to the name of our service, that file is simply mapping the argument to a service name in the docker file.
Setup a Linux service to keep everything running
At this step, we have to create a Linux service that will make sure to start the application every time the server starts or our application stops. The following script will help you do that:
[Unit]
Description=[APP_NAME] service executed by docker compose
PartOf=docker.service
After=docker.service
After=network.target

[Service]
Type=oneshot
RemainAfterExit=true
WorkingDirectory=/home/ubuntu/[APP_FOLDER]
ExecStart=/usr/bin/docker compose up -d --remove-orphans
ExecStop=/usr/bin/docker compose down

[Install]
WantedBy=multi-user.target
Let's analyze it !!!
The
Unitsection describes our service and specifies what service our unit is part of, in this case, it's the docker service, this will make sure our service always runs when the docker service is running as well.The
Servicesection describes how to run our service, the interesting parts areWorkingDirectory,ExecStartandExecStopcommand, they will be used according to what their name means, for example, if the service is namedmyappwhen you type the commandsystemctl start myappthe commandExecStartwill be executed. You can learn more about Linux service here https://www.redhat.com/sysadmin/systemd-oneshot-service. Learn more on how to run the docker service withsystemdhere: https://bootvar.com/systemd-service-for-docker-compose/
This service needs to be installed in a way the system will run it when needed, you will have to save it in a file with a name for example: myapp.service
touch myapp.service
# open it
nano myapp.service
# paste the previous scrip in it
cp myapp.service /etc/systemd/system/myapp.serivce
At this point it's recognized as a Linux service, you can run systemctl start myapp to start it. The following required command is
systemctl enable myapp.service
This will make sure the service is automatically executed by the server on each reboot. You can learn more here: https://medium.com/@benmorel/creating-a-linux-service-with-systemd-611b5c8b91d6
The web server
I used Nginx for this task, it's small and powerful, it's widely used, and can act as a load balancer, a static file server, a reverse proxy, and much more. The first thing to do is to install it.
sudo apt-get install nginx
At this step the docker image is supposedly running, let's suppose it contains an app running on the port 8080 , and that port is bound to the server via the docker-compose file. We need to set up a reverse proxy configuration between Nginx and our port. Here is the configuration needed :
upstream app_backend {
  server localhost:8080; # the appliction port
}

server {
  listen 80;
  server_name [DOMAIN_NAME];

  location / {
    proxy_pass http://app_backend;
    proxy_http_version 1.1;
    proxy_set_header Upgrade $http_upgrade;
    proxy_set_header Connection 'upgrade';
    proxy_set_header Host $host;
    proxy_set_header X-Real-IP $remote_addr;
    proxy_set_header X-Forwarded-Proto $scheme;
    proxy_set_header X-Forwarded-For $proxy_add_x_forwarded_for;
    proxy_cache_bypass $http_upgrade;
  }
}
let's call this config myapp.conf and save it under a directory where nginx will find it, that folder amongst others is named /etc/nginx/conf.d/.
sudo touch /etc/nginx/conf.d/myapp.conf
sudo nano /etc/nginx/conf.d/myapp.conf
# paste the content there
Now all we need is to test it and restart the NGINX service with the following commands
sudo nginx -t # test if the config is valid
sudo nginx -s reload # reload the nginx service so it will consider it
This configuration will instruct nginx to listen to the traffic on the port 80 and with the domain name [DOMAIN_NAME] and send it to your app server on the port 8080 via the directive proxy_pass , the line location / { simply mean capture all the requests starting with / and perform the actions written under the location block. Learn more here https://www.theserverside.com/blog/Coffee-Talk-Java-News-Stories-and-Opinions/How-to-setup-Nginx-reverse-proxy-servers-by-example.
The Build Pipeline
After having configured the server, we have to set up the build pipeline now, it mainly consists of 1 step, write a Github Action pipeline file and add it to the project, let's go.
GitHub Actions Setup
GitHub action will be used to build the docker image from our source code and pushed to the registry from where the image is pulled and executed on the server. I will take a sample Dockerfile for this example, but in practice, you will have to write your own Dockerfile. For an express.js application, the docker file would be like this:
# Fetching the minified node image on apline linux
FROM node:slim

# Declaring env
ENV NODE_ENV production

# Setting up the work directory
WORKDIR /express-docker

# Copying all the files in our project
COPY . .

# Installing dependencies
RUN npm install

# Installing pm2 globally
RUN npm install pm2 -g

# Exposing server port
EXPOSE 8080

# Starting our application
CMD pm2 start process.yml && tail -f /dev/null
Building and running this docker file will start our application on port 8000, but in our setup, we will have to run it with docker-compose.
The next thing is to set up the GitHub actions pipeline. For that simply create a folder .github/workflows in the project root and create a file named docker-build.yml, we will write our pipeline into it.
name: Build, Push to ECS and Deploy to Server

on:
  push:
    branches: ['deploy/main']

jobs:
  build:
    name: Build Web Image
    runs-on: ubuntu-latest

    steps:
      - name: Check out code
        uses: actions/checkout@v2

      - name: Configure AWS credentials
        uses: aws-actions/configure-aws-credentials@v1
        with:
          aws-access-key-id: ${{ secrets.AWS_ACCESS_KEY_ID }}
          aws-secret-access-key: ${{ secrets.AWS_SECRET_ACCESS_KEY }}
          aws-region: [AWS_REGION]

      - name: Login to Amazon ECR
        id: login-ecr
        uses: aws-actions/amazon-ecr-login@v1

      - name: Build, tag, and push image to Amazon ECR
        env:
          ECR_REGISTRY: ${{ steps.login-ecr.outputs.registry }}
          ECR_REPOSITORY: [REPOSITORY_NAME]
          IMAGE_TAG: latest
        run: |
          docker build -t $ECR_REGISTRY/$ECR_REPOSITORY:$IMAGE_TAG .
          docker push $ECR_REGISTRY/$ECR_REPOSITORY:$IMAGE_TAG

      - name: Restart the service via SSH
        uses: appleboy/ssh-action@v1.0.0
        with:
          host: ${{ secrets.HOST }}
          username: ${{ secrets.USERNAME }}
          password: ${{ secrets.PASSWORD }}
          port: ${{ secrets.PORT }}
          script: /home/ubntu/[APP_DIRECTORY]/redeploy.sh web
There are several steps to look into here:
Configure AWS credentials: here the system will load the previous aws key you created earlier, you will have to register them into your GitHub account's secretsBuild, tag, and push image to Amazon ECR: this step will run the commanddocker buildanddocker pushto create the docker imageRestart the service via SSHthis step will connect to the server and restart the whole application at once.
This pipeline will run every time there is a pull request merged against the deploy/main branch.
on:
  push:
    branches: ['deploy/main']
At this point the whole system is in place and tied up, now it's possible to edit and apply it to your specific case. In a future article, I will share the process of building the application itself for production and running in a docker file.
Conclusion
This article attempts to describe the process I use to set up a VPS for automation when it comes to deployment. it describes how to set the process of application execution inside the server and the process of building the application, each part can be done with another tool, for example, you can swap nginx with Treafik if you want, and you can replace the systemd service with a program in supervisor and more. This process does not cover additional stuff like backing up the server or closing default ports on the servers, those will be explained in future articles. Feel free to ask a question if you want to adapt this to your flow. In another article I will focus on how to set up an application to be production-ready in terms of deployment, that's the part of the process that comes before the build of the Docker Image.
I hope you enjoyed the read.
I'm here to assist you in implementing this within your company or team, allowing you to concentrate on your core tasks and save money before tapping into the vast potential of Mastodon.